先搞懂整個流程
整體可以拆成五個階段:
1. 申請 GitHub Student Developer Pack
先登入自己的 GitHub 個人帳號,接著進入 GitHub Education Benefits, 在 GitHub Education 區域選擇 Start an application。
- GitHub 個人帳號
- 學校 Email
- 學生證
- 當學期課表
- 成績單
- 在學證明
2. 確認 GitHub Education 已經通過
學生資格審核通過之後,再回到 github.com/settings/education/benefits 。
3. 找到 GitHub Copilot 的 Student Benefit
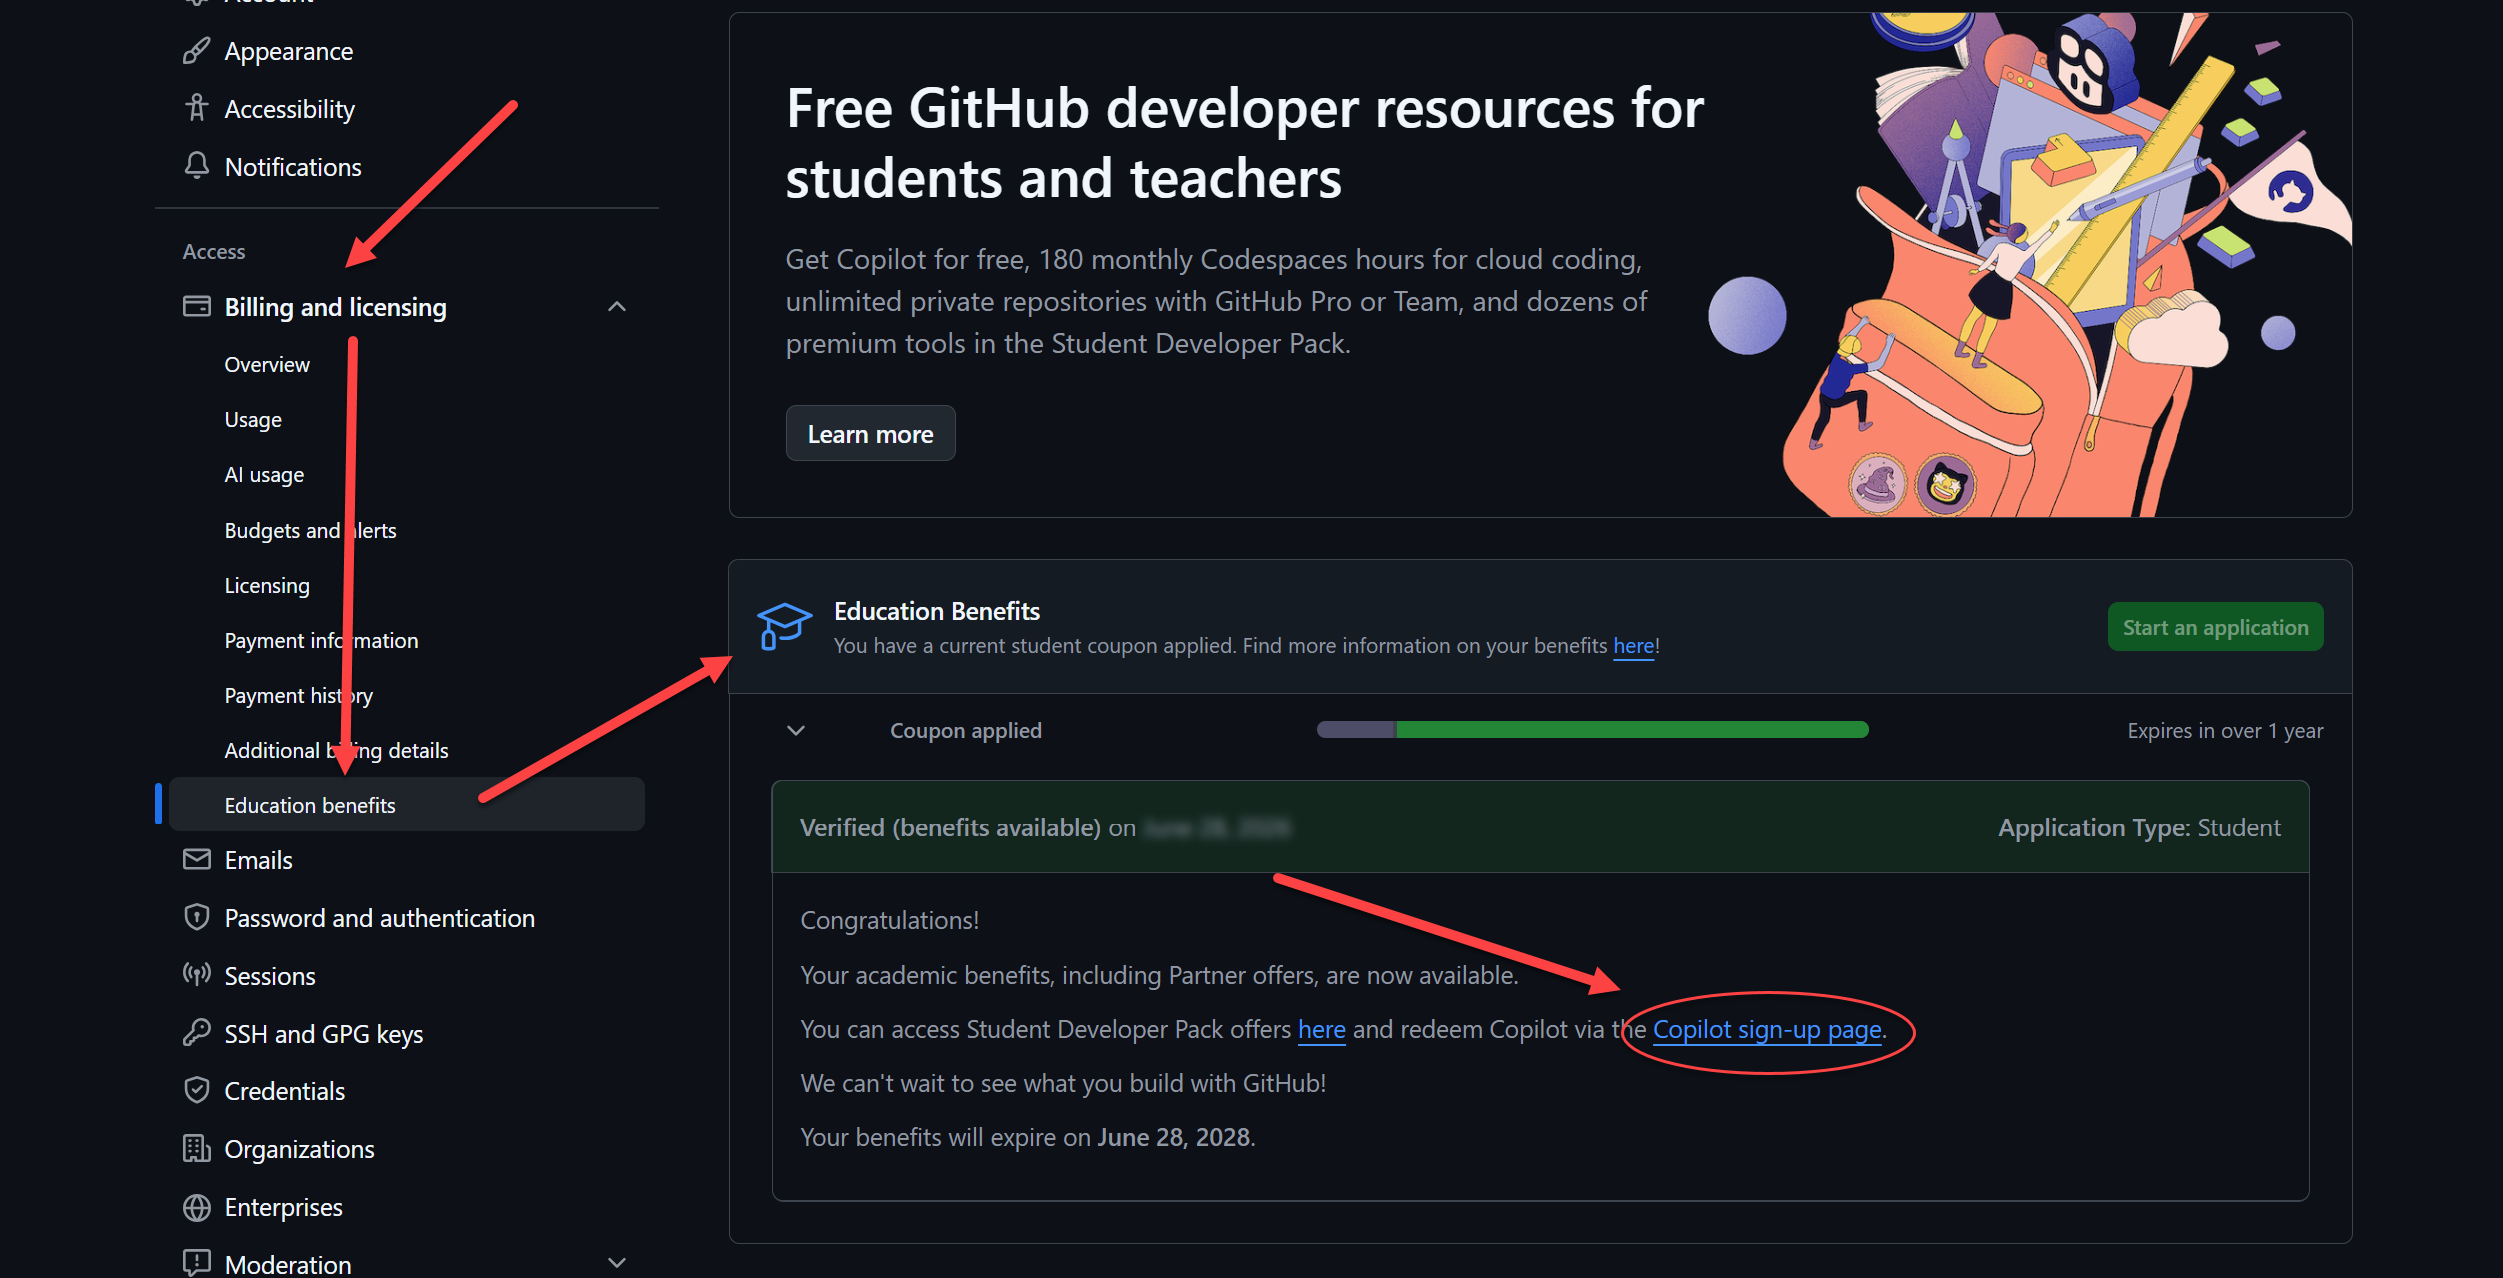
如圖 1,Education Benefits 頁面上方顯示 Free GitHub developer resources for students and teachers, 下方的 Education Benefits 區塊則列出已通過驗證的學生權益。
在該區塊中找到並點選 Copilot sign-up page 連結,接著進入 Copilot Student 的啟用流程。
4. 啟用 GitHub Copilot Student
進入 Copilot Student 頁面後,先確認畫面顯示 Congratulations! You are eligible to use GitHub Copilot Student for free.。 這表示你符合免費使用 Copilot Student 的資格,接著點選 Get access to GitHub Copilot。
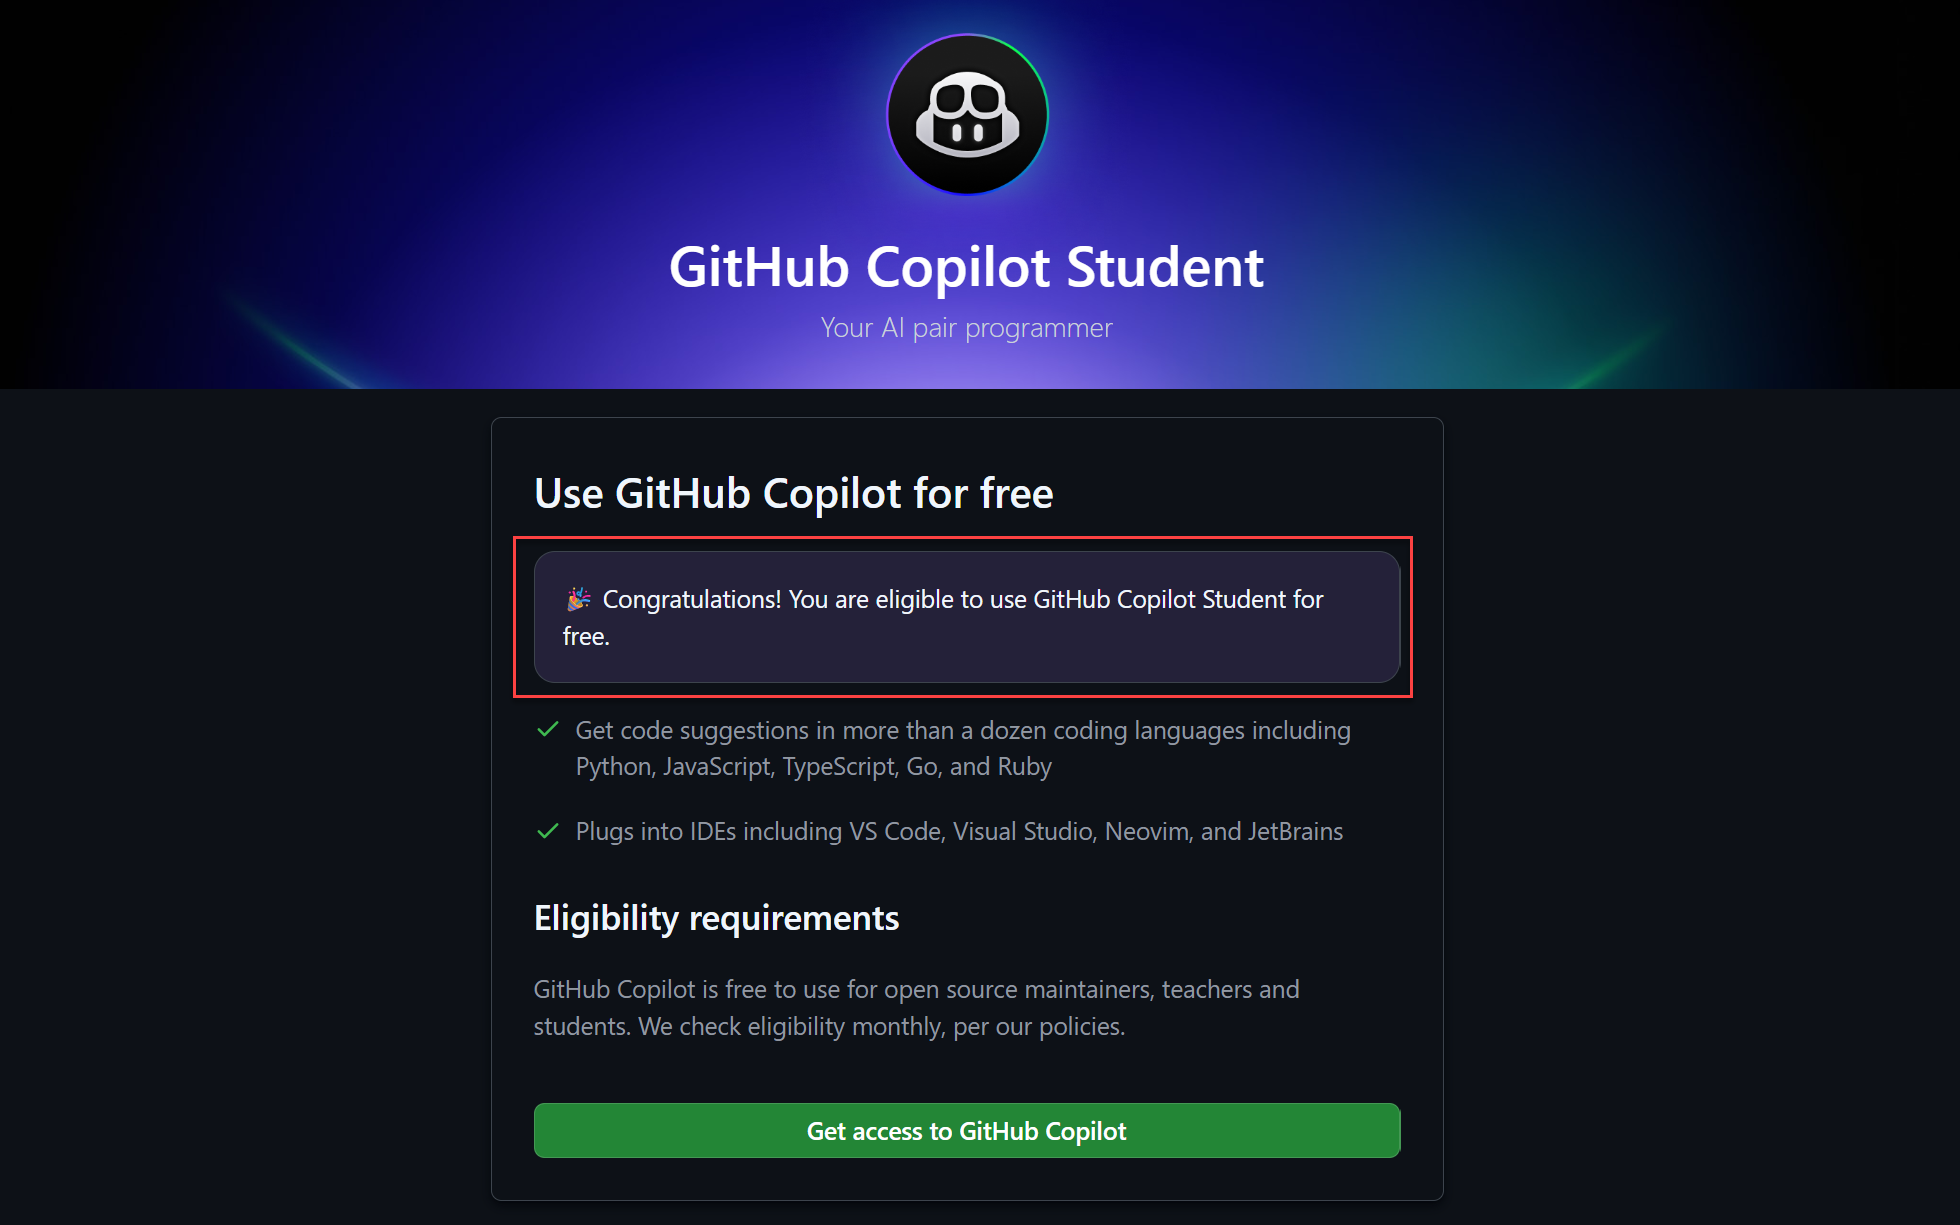
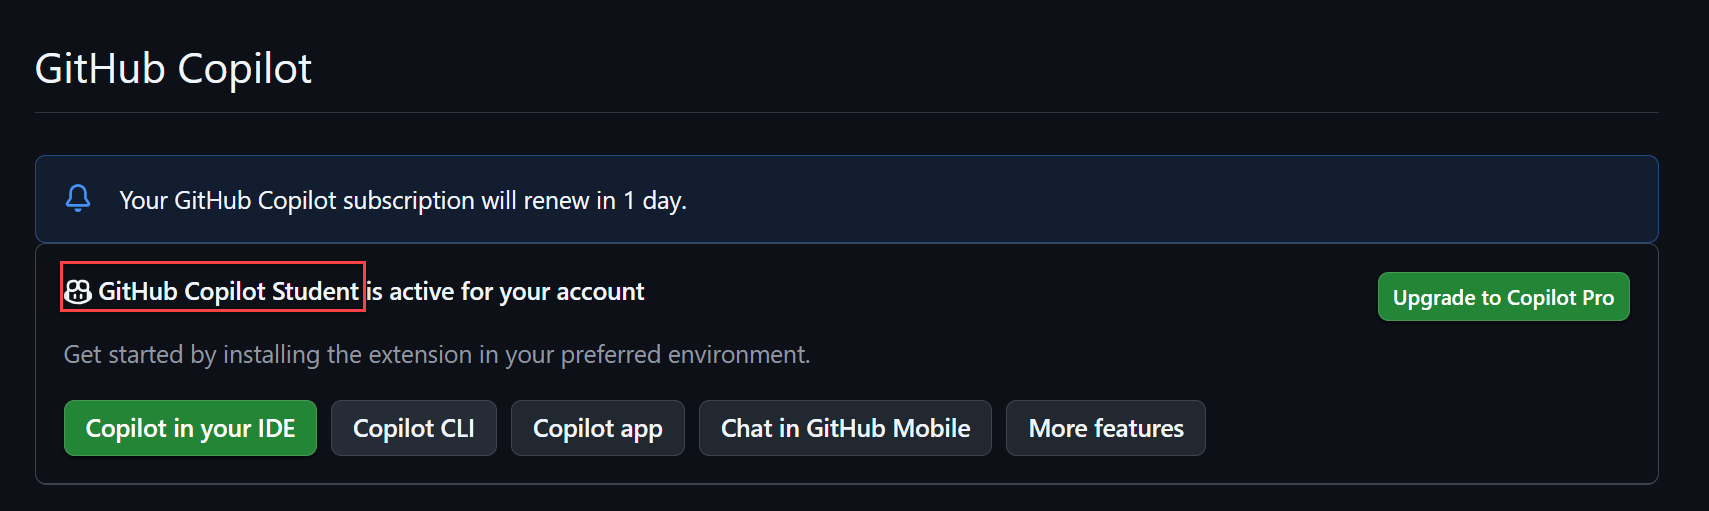
接著依照畫面提示完成 Copilot Student 的設定與政策選擇。完成後,回到 GitHub Copilot 設定頁面, 確認顯示 GitHub Copilot Student is active for your account。 看到這個狀態,才表示 Copilot Student 已經啟用,而不只是學生資格審核通過。
Copilot 啟用頁面: github.com/github-copilot/free_signup
5. 回到 VS Code,登入同一個 GitHub 帳號
完成 Copilot Student 啟用後,回到 VS Code。這裡最重要的是:
- 打開 VS Code
確認已安裝 GitHub Copilot 相關擴充套件。 - 檢查目前登入的 GitHub 帳號
如果先前登入過其他帳號,先登出。 - 重新登入申請 Student Pack 的帳號
完成授權後再回到 VS Code。 - 確認 Copilot 權限
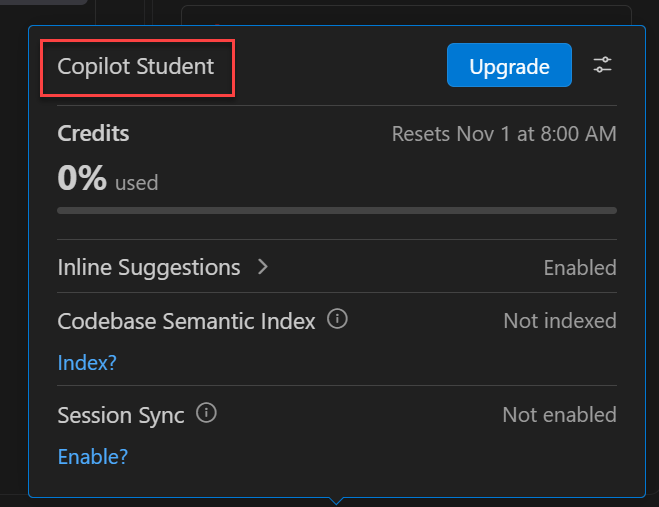
開啟 VS Code 的 Copilot 狀態面板,確認方案顯示為 Copilot Student,如圖 4。
常見問題
Student Developer Pack 已經 Approved,為什麼 Copilot 還不能用?
Student Pack 通過與 Copilot Student 啟用是兩個步驟。請回到 Education Benefits,點選 Copilot sign-up page 連結,繼續完成啟用,並確認 GitHub Copilot 設定頁面顯示 Student 方案已啟用。
為什麼 Copilot 頁面還顯示 Copilot Free?
Student Benefit 可能還沒有完全套用。剛通過審核時,可以稍後再重新確認,不要急著購買付費方案。
GitHub 網站已經可以使用,但 VS Code 還是不行?
先檢查 VS Code 登入的是不是同一個 GitHub 帳號。如果你有多個 GitHub 帳號,這是最常見的原因之一。